A Waldorf Paper Lantern Tutorial
In the spirit of Martinmas, I've come up with something to share with you .
Now, I've never written a tutorial...so, bear that in mind as you wade through this long strand of mediocre photos and murky instructions. Hopefully by the end, though, you'll have enough clear information to create these lovelies for your own.


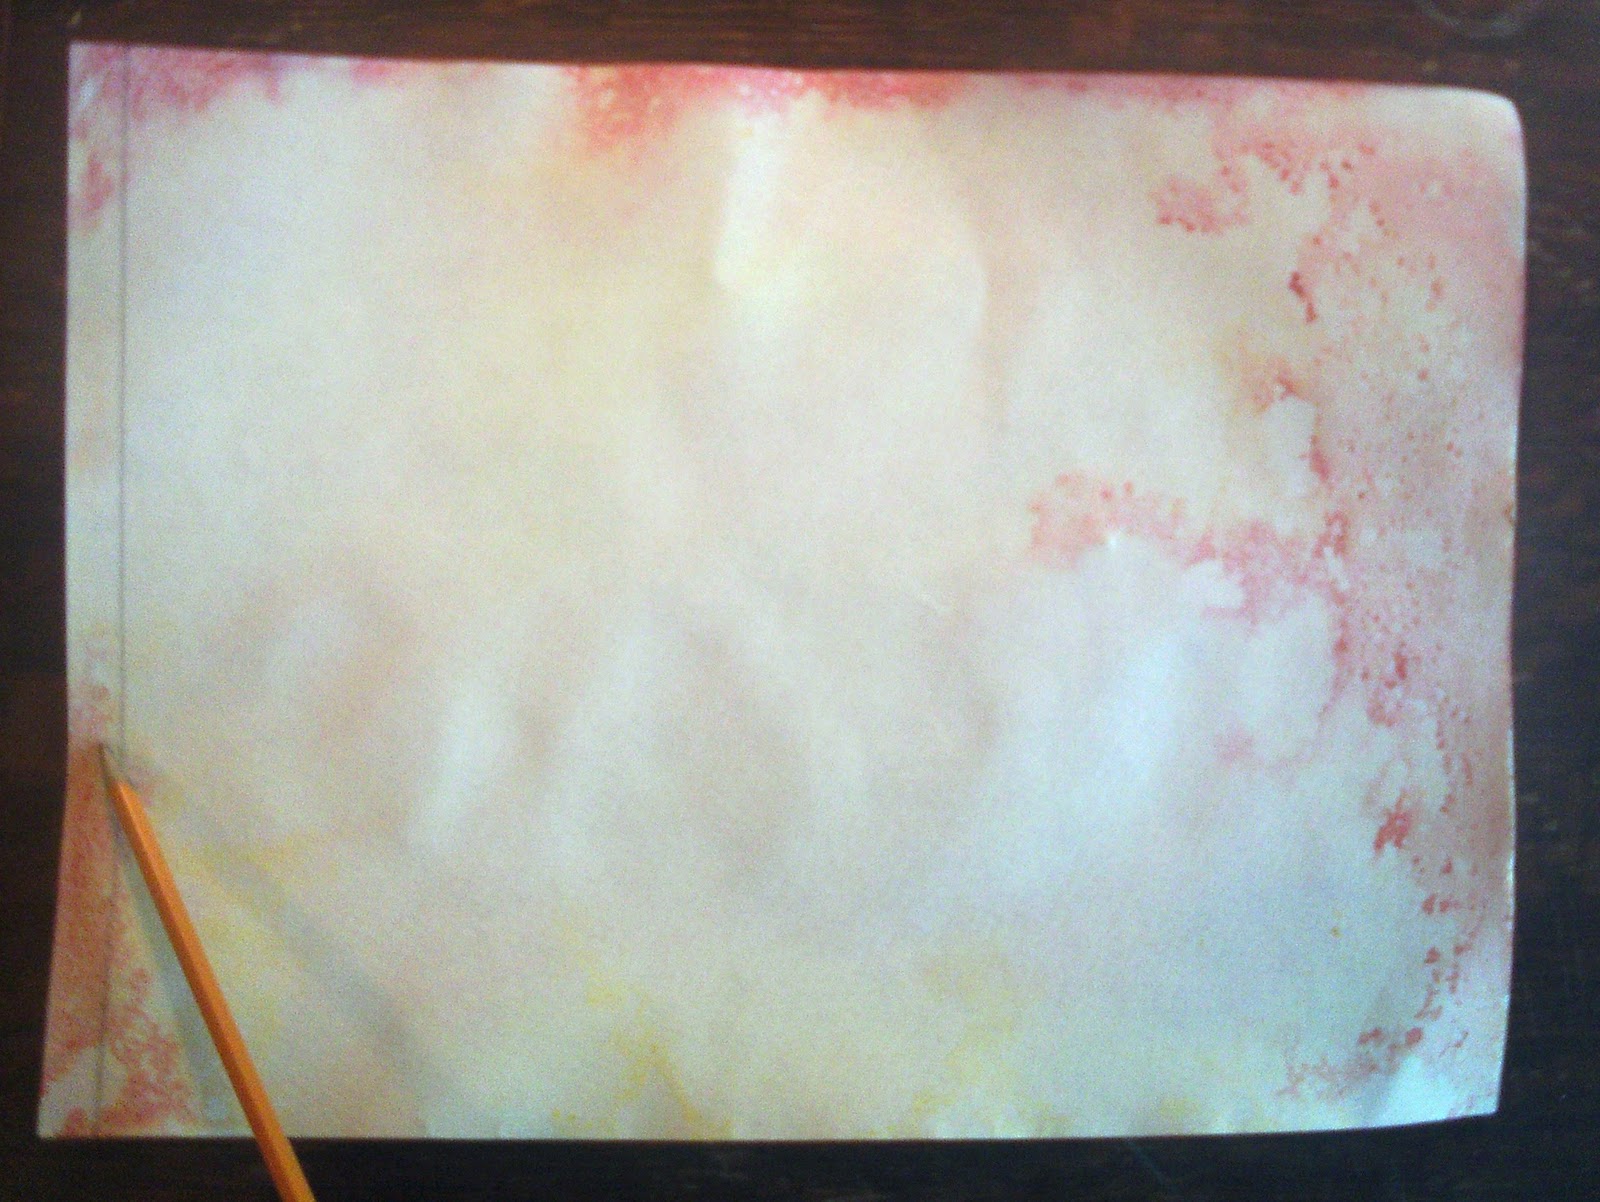
To make the paper more translucent, use a soft cloth or paper towel to gently rub oil over the entire surface of the paper, front and back. I just used canola oil, and I've used olive oil before, too.

You can hold the paper up to the light to see where the translucency has occurred and where you may have missed a spot. Wipe away as much excess oil as possible.

If you feel like there is still alot of oil on your paper, lay it between sheets of clean newsprint, then between layers of newspaper and weight it down with a big book for a while. This will blot away extra oil. When I am making several lanterns at a time, I oil all the sheets of paper and store them like this. Skip this blotting step if you feel that you were able to wipe enough oil off and your paper no longer tacky with oil.
On the back of the paper, mark a line about 1/2" from the edge. Fold the paper along that line To make the crease very flexible, fold first to the front, then to the back, then lay the paper flat again.

Now fold the paper from the right, all the way over to the 1/2" mark. Again, crease the paper sharply, folding both to the front and back. Every fold we make must be creased in this manner.

Fold in half again, up to the 1/2" line.

Does your paper look like this?

Now fold it horizontally in half. (Don't forget to crease it to the back and the front).

Fold again horizontally into fourths.

When you open the paper flat again, you should have 4 equal rows of 4 equal rectangles with that little 1/2" strip running down the left side. Next, use a straightedge to draw pencil lines diagonally across the rectangles from corner to corner...do this only for the 8 rectangles in the center rows as shown.

Do the same thing going the other way, dividing those center rectangles from corner to corner.

Crease the paper along these diagonal lines, folding to both the front and back as usual. This is tricky to explain, but not difficult to do.

Here is another picture of the same action. Just fold on all the diagonal pencil lines that go one direction, then fold on all the lines that go the other direction.

You paper should be looking rather like this. Go up to that top row of rectangles and fold it into thirds...like you are hemming fabric; fold it over a third of the way, then fold it over again.

Now use scissors to cut along the folds that separate the 4 rectangles in the bottom row. Also, let's trim away a couple of bits that we won't be needing. Can you see that I've snipped away a portion of the 1/2" strip down on the bottom left? And also up at the top left?

Here's a closer look at the top left corner...don't snip away too much!

Now the fun begins! "Hem" the top edge of paper by turning it down and gluing it along the folds you made earlier. Depending on what kind of glue you are using, you may need to wait for glue to dry between steps from here on out.

Bring the right side of the paper over towards the left. Glue the 1/2 strip (or tab, or flap, if that helps make this clearer) to the back of the righthand edge of the paper.

Here is a closer look at that step...I like to slip the very top of the1/2" tab/flap/strip in between the folds of the "hem" to make a neat finish.

Do you have something that looks like this? Let the glue dry before going on.

When the glue is set, you should have something that opens into a rectangular tube-like shape.

Here's another look from a different angle. This "hemmed" edge is the top of the lantern.

The flaps at the other end fold in to form the bottom. Glue these as you fold them on top of each other.

I like to cut a square of card stock to glue to the bottom. It makes it sturdier and gives it a more finished look.

And here is another square of card stock glued to the inside to finish that, too.

A heavy can or jar can weight things down while the glue sets. (That is the pasta sauce that I'm going to have to feed my family tonight because I've spent all afternoon goofing around with lanterns).

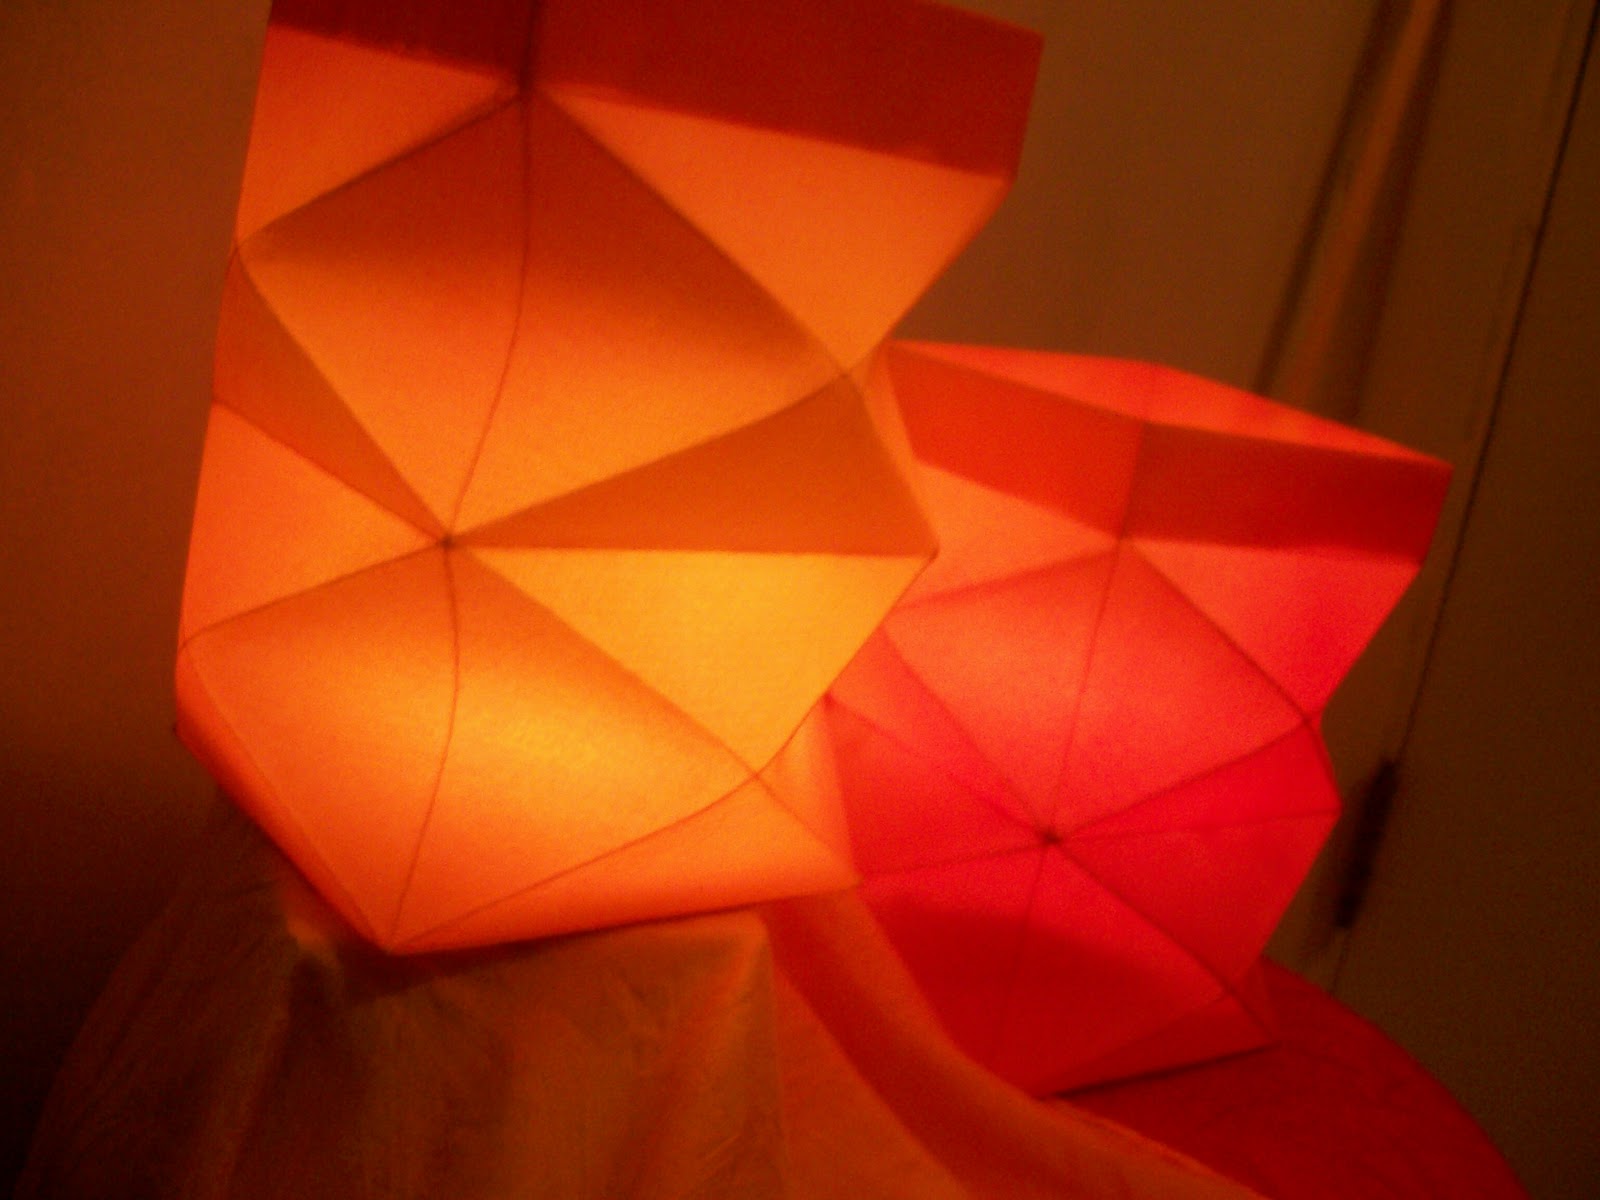
Once all the glue is dry, you can begin shaping the lantern. This is why we folded every crease both to the front and the back...so we could get this awesome shape. Beginning at the sharp corner edges of the lantern, press the diamond shapes so that they pop inward.

Work your way from diamond to diamond...all the diamonds should curve inward at their centers and point outward at their points. Just keep manipulating the paper until you are able to achieve this.

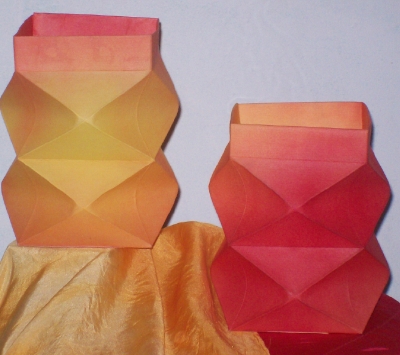
And there it is! Just the right size for a centerpiece or mantle decoration...or a Lantern Walk! You can make a string or wire handle to thread through holes punched in the top edge if you like. A tealight candle can be glued to the center of the bottom of the lantern...it is quite safe.

Happy Martinmas! Welcome Season of Light!

paper star lantern tutorial

I suppose it isn't exactly the right time of year for stars and lanterns, but I've got a paper folding fascination at the moment and so was drawn to a project I had wanted to do back in Autumn. During last lantern season I was looking everywhere for instructions to make these beautiful paper lanterns and couldn't find them anywhere. I ended up purchasing a lantern that was already made and since I've been struggling with some difficult folds and designs of other paper crafts, I decided to unfold the seemingly simple lantern I bought and figure the thing out for myself. Like all traditional origami, no glue or cutting (once the basic outside shape of the paper is made) are required. I feared that once I unfolded my lovely store-bought version I wouldn't be able to get it back together but thankfully it wasn't nearly as difficult as I assumed.
Since in my own quest for instructions I crossed paths with many other people looking for the same thing, I thought I'd do my best to share what I learned. There may be better ways to do this and certainly my origami terminology will lack a little something but this is how I worked it out:
Begin with a 12" square of paper to end up with a lantern that is about 7" across when complete. (Those beautiful wet-on-wet water colored paintings our children are turning out each season make for the lovliest lanterns. Also, 12x12 is the standard size of the amazing array of scrapbook paper found at local craft stores.)
(Feb., 2012 edit: A video tutorial of this project can now be found here.)

With what will ultimately be the outside of your lantern (the painted side) face up, fold the paper in half horizontally and vertically and then again on each diagonal effectively dividing the page into eight pie wedges.
For crisper creases and to help fold thicker card stocks, try using a bone folder. The more exact the folds, the nicer the finished project will be.
(The dashed and dotted lines shown here are guides for the next step.)
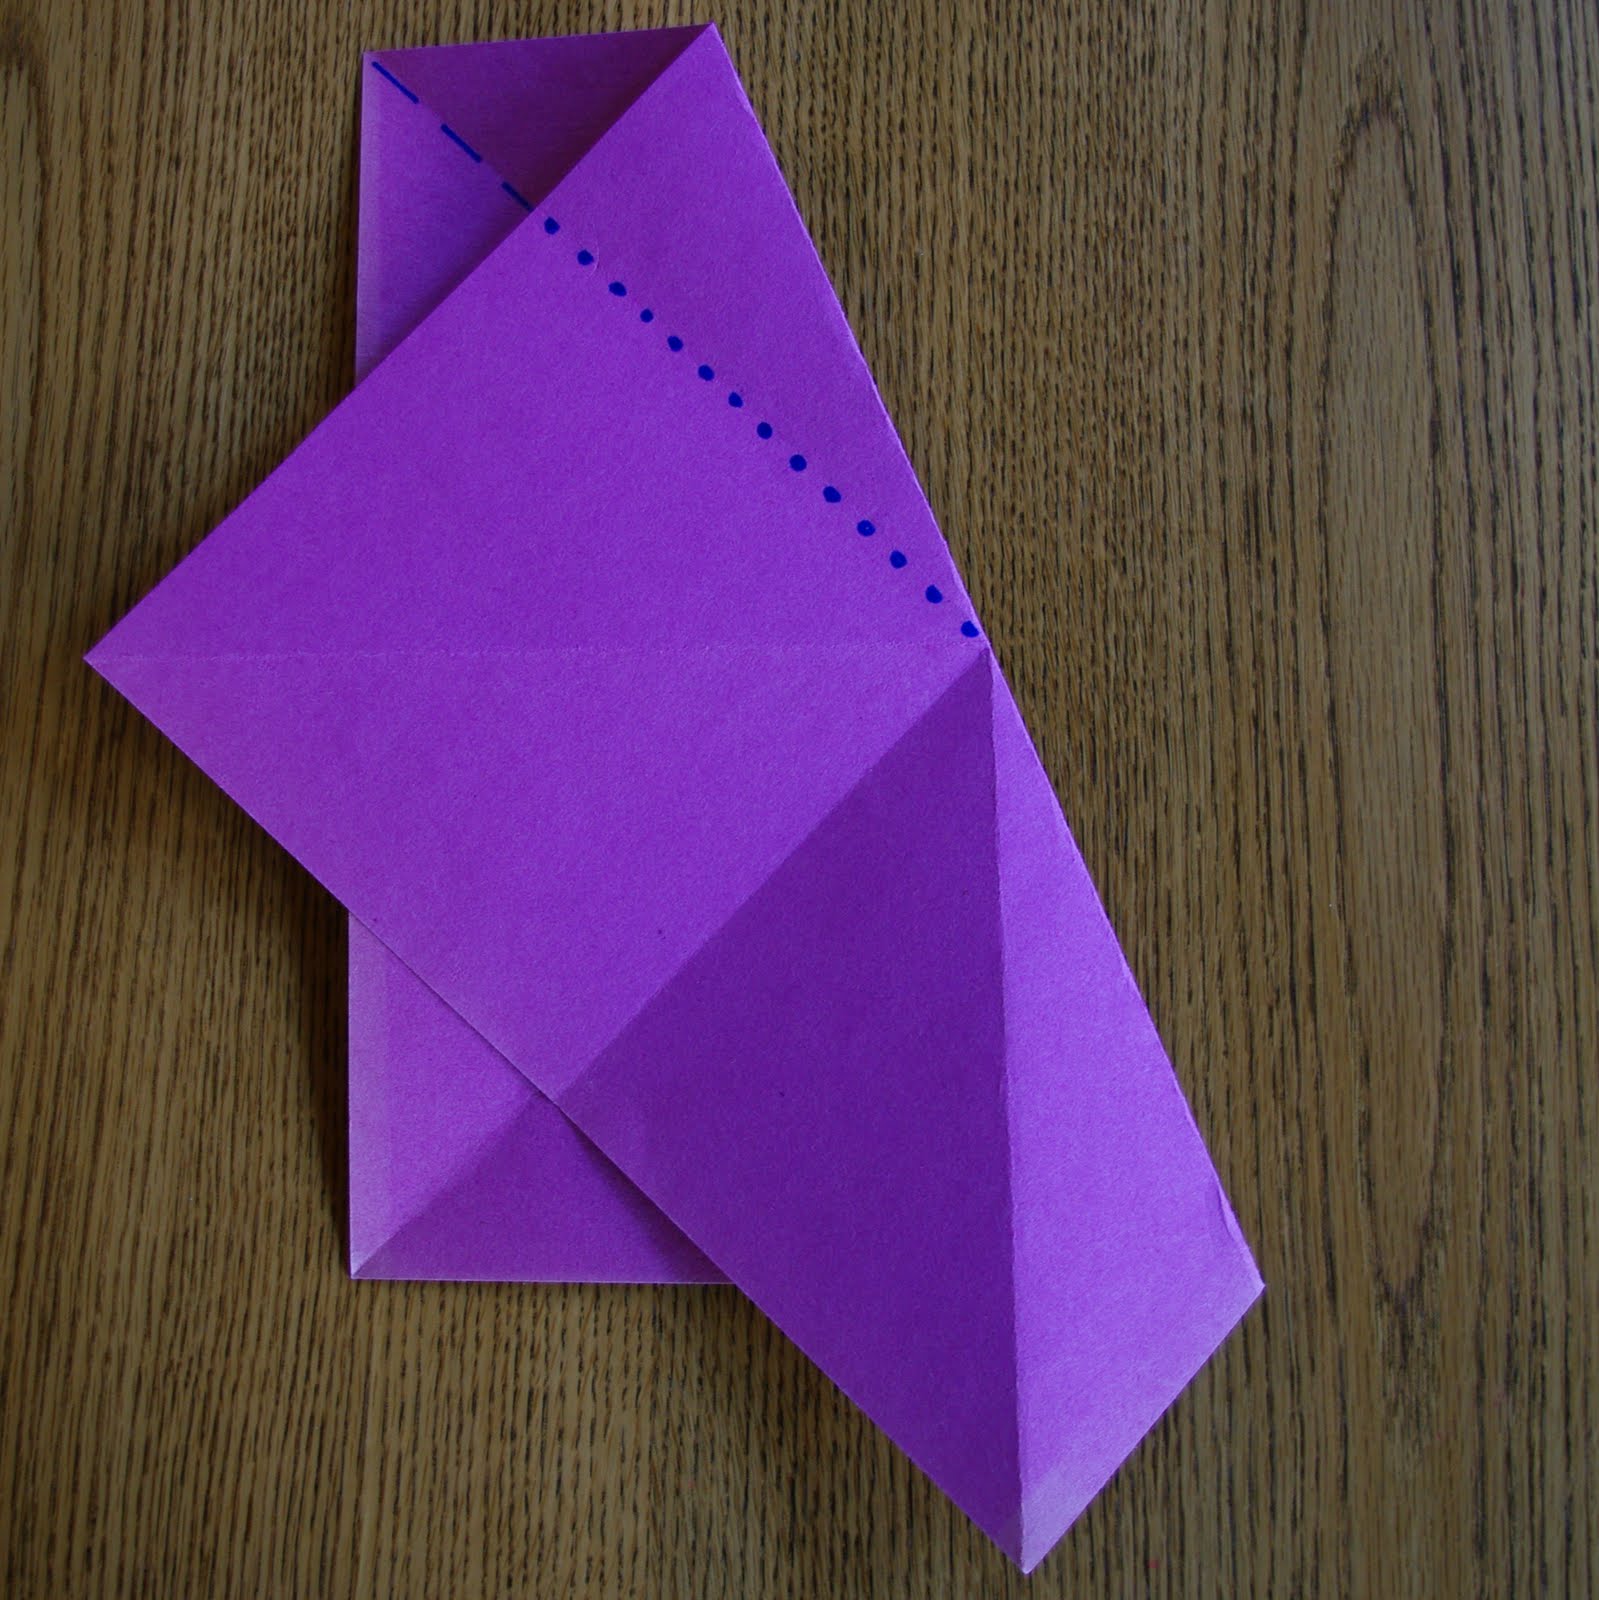
To further divide the paper into 16 wedges, turn the paper over(painted side down so this second set of 8 folds are "valleys" to the first 8 fold's "hills") and make another fold between each of the eight sections by lining up the existing folds and the center point.
To help illustrate I marked the paper with dotted and dashed lines. The dotted lines (marked on both the front and back of the page) fold to align directly on top of the dashed line. (For more exact alignment, check the line at 90° and make sure it also aligns exactly with the corner fold underneath it.)
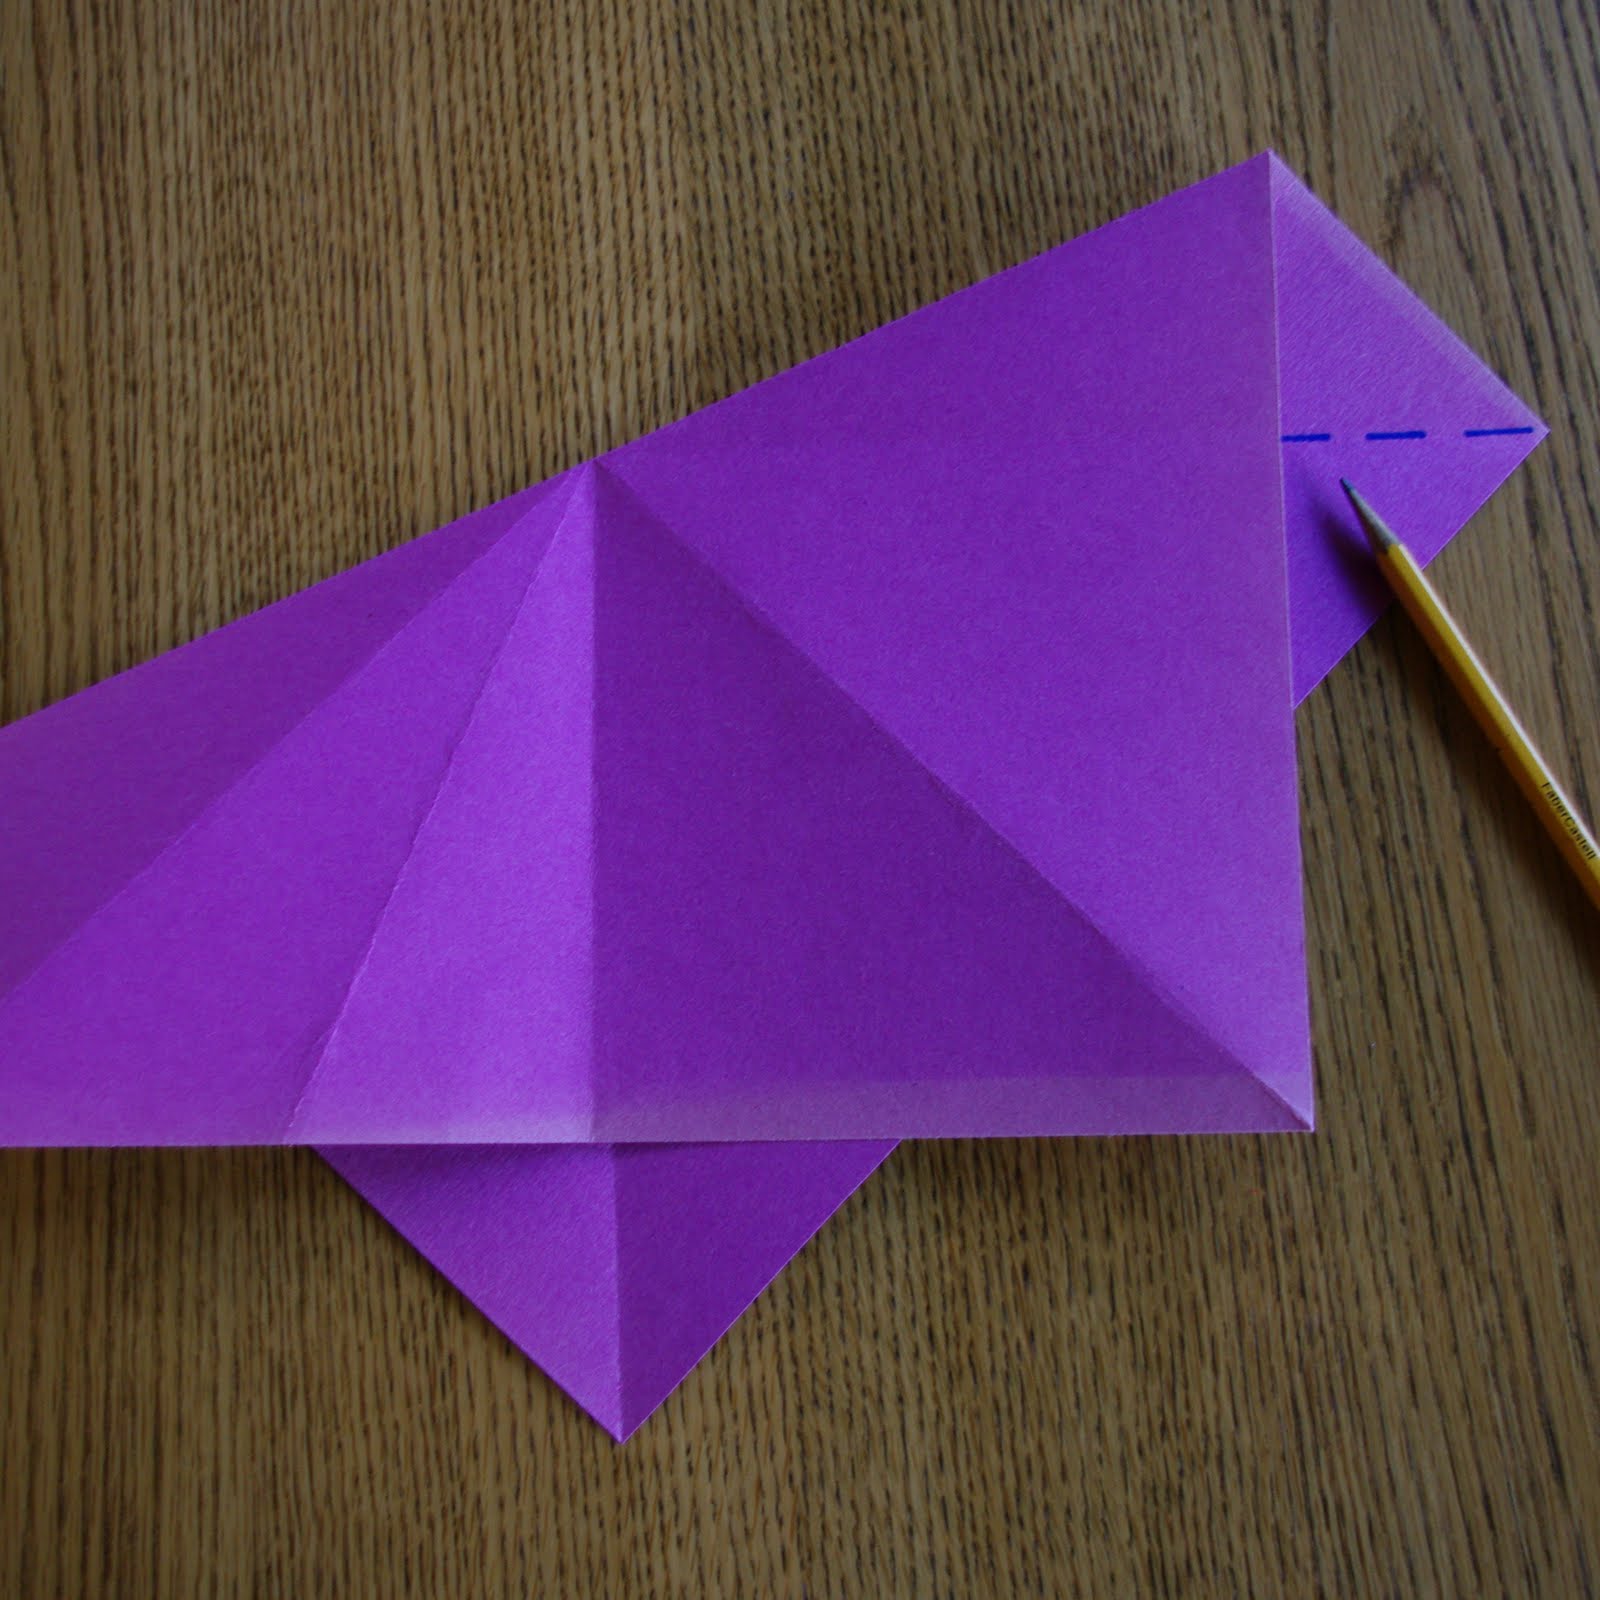
At the same time these folds are being made, lightly mark with a pencil the triangle piece that is sticking out at each of the four corners.
The only scissor work of this project takes place here.

Cut off the four marked corners of the paper.
With all of these folds complete and the corners removed, the octagonal "pie" will now have 16 wedges.
With the painted side down, using the existing lines between the eight points as a guide (the dotted lines), fold down the paper edge (on the dash-dot line that connects the end points of the dotted lines).

For extra visual assistance, note that the solid lines lay one atop the other.
Repeat this fold eight times.
It might be easiest to understand this by first folding in the top, bottom and two sides, creating a square, then unfolding the paper, rotating it 45 degrees and repeating the process of creating a second square.

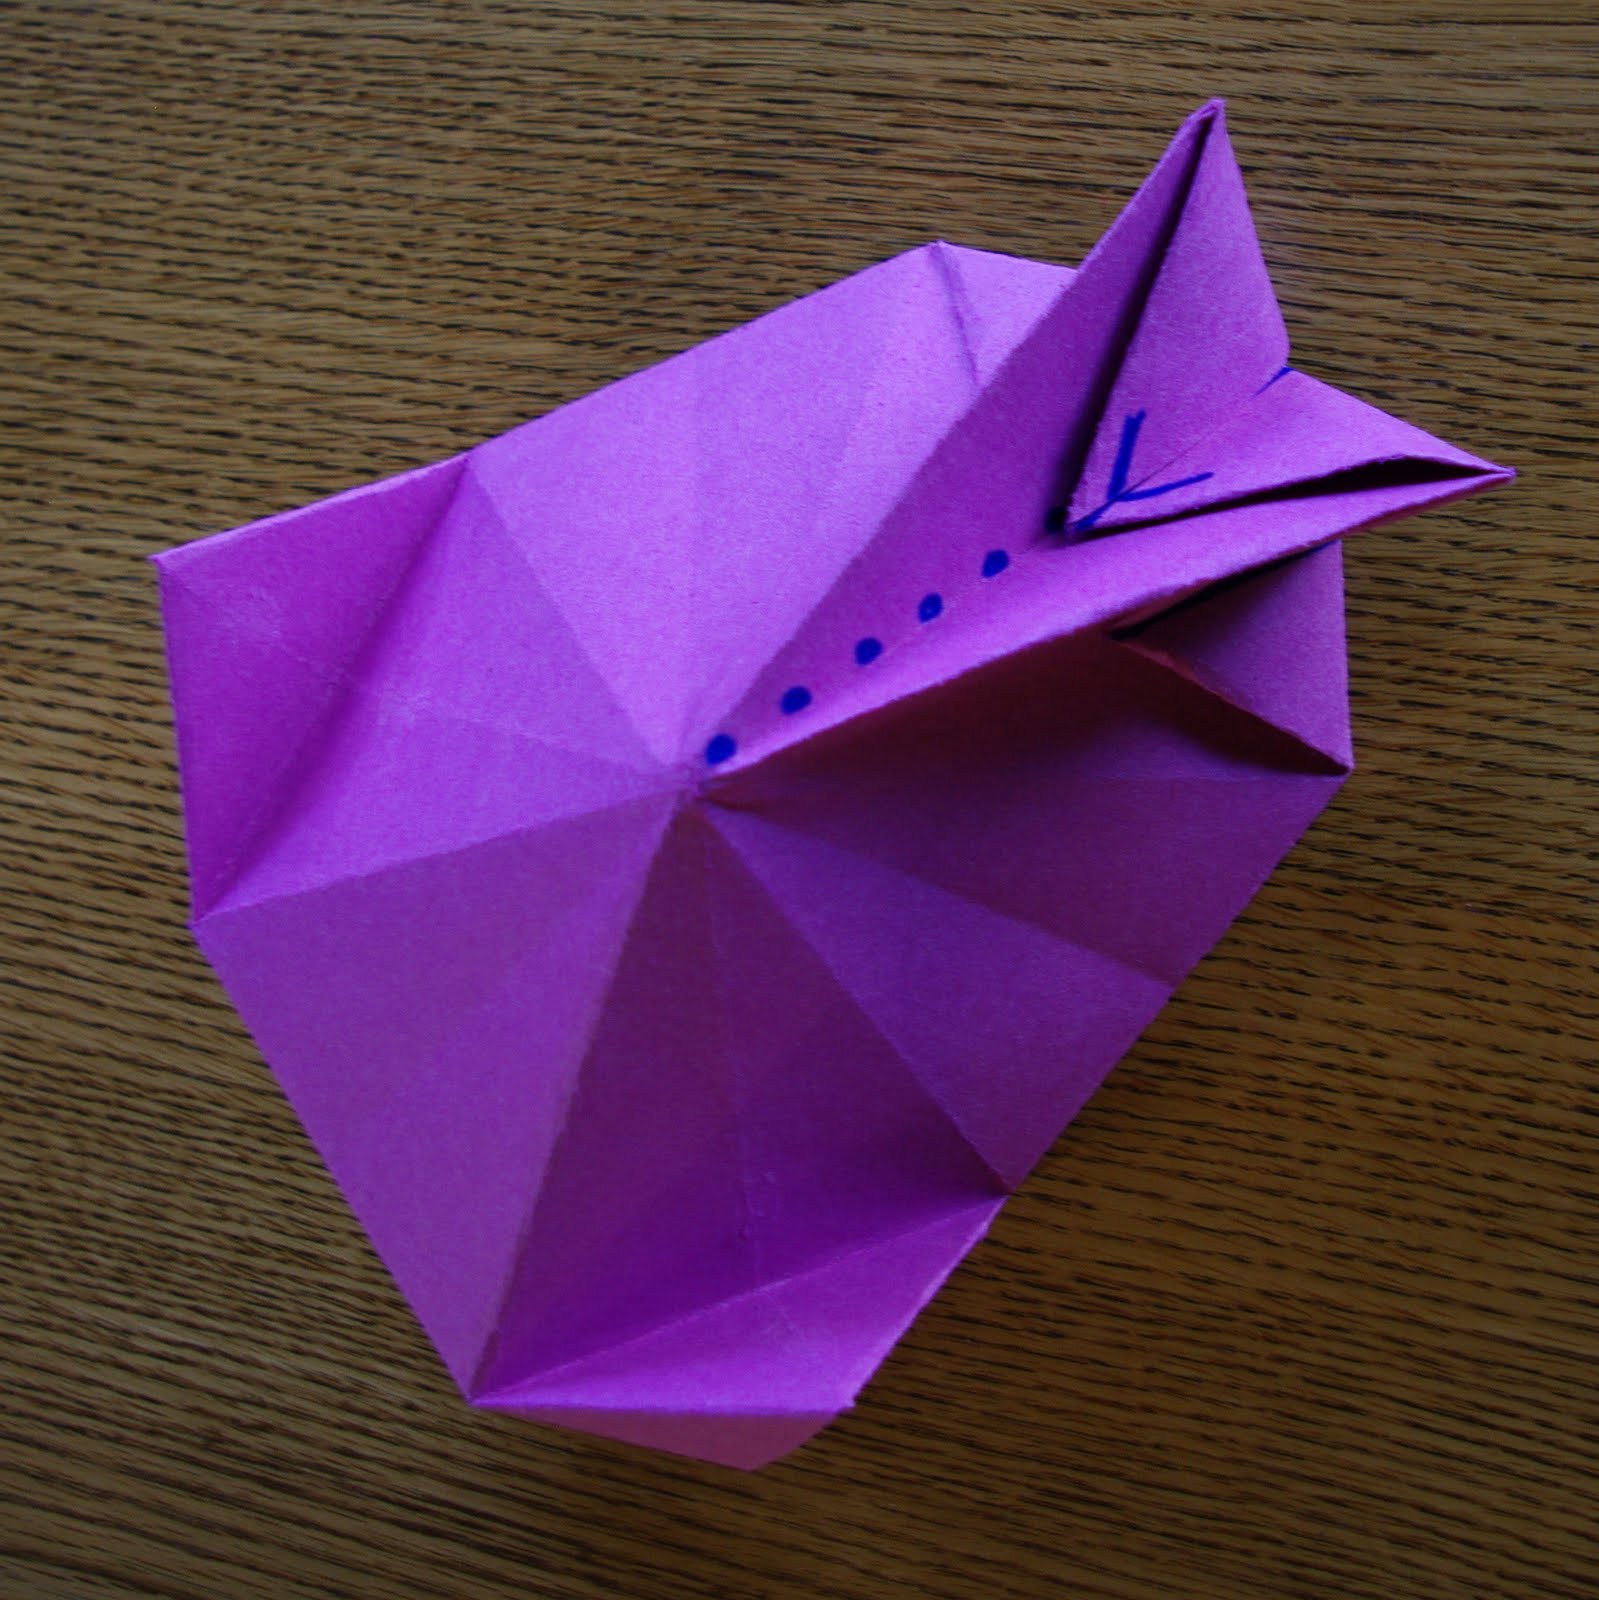
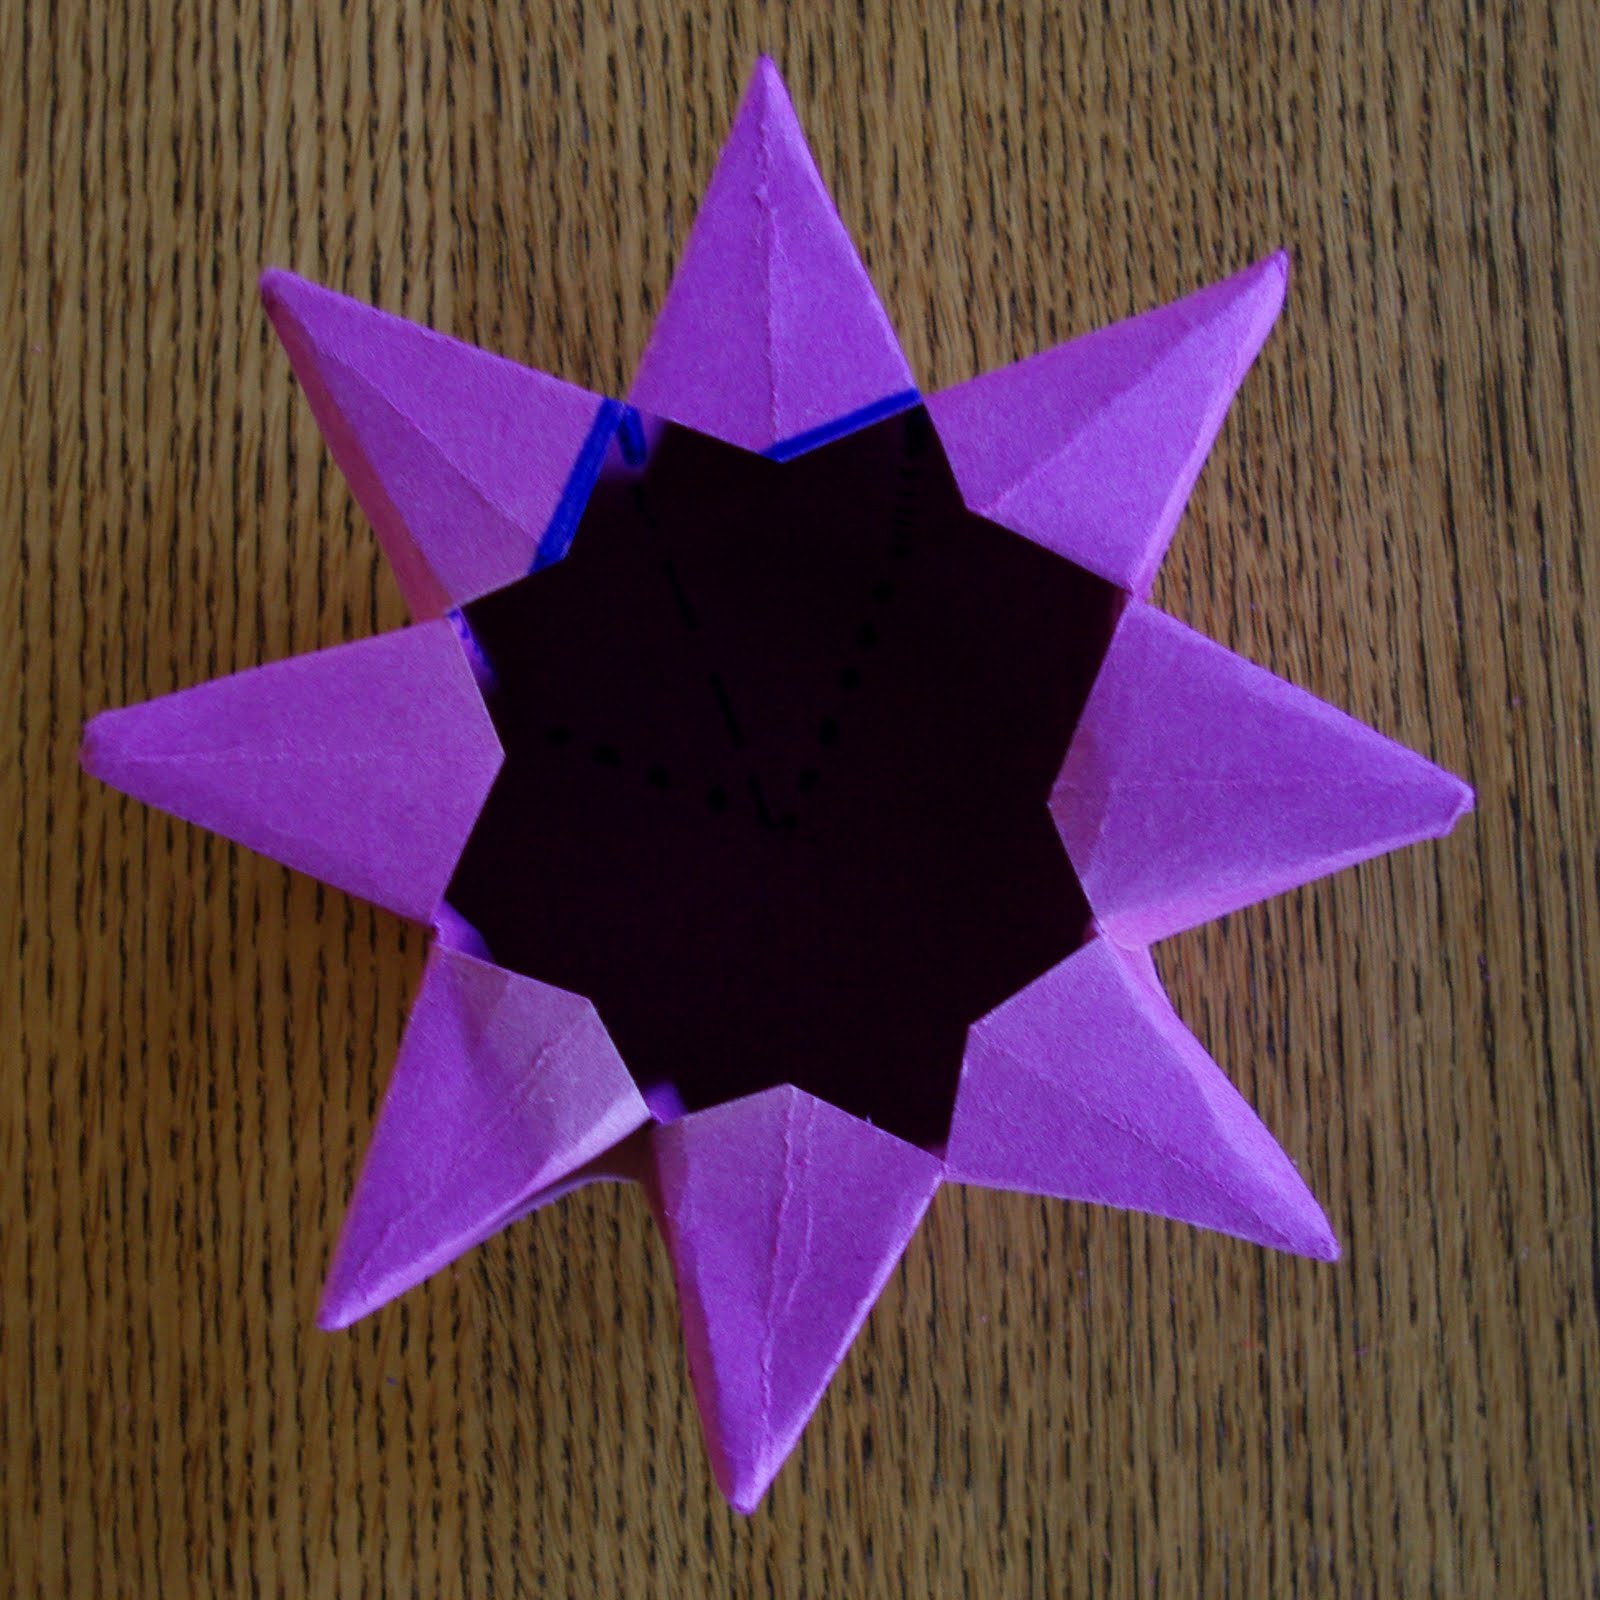
In the end there will be an eight pointed star formed by the folds (or two squares - one overlaying the other).

Fold in the edges of one of those squares.
Again, if the paper has a painted side, it is face down for this step.

Flip over the paper (so the outside is up) and fold in the already creased corners.
This is where it gets tricky and the instructions are best understood with paper in hand just trying to work it out I think...

Between each folded-in corner, reach around to the other side of the paper and gently grab the center point (where the arrow is pointing) from the back side.
It will, by nature of the existing folds, turn into a triangle as it is pulled.
Flip that triangle over the edge until it too points to the center of the side of the page that is currently face up. (For illustration purposes I drew the arrow on both sides of the paper.)
The center of the paper will start to crinkle and this is totally fine.
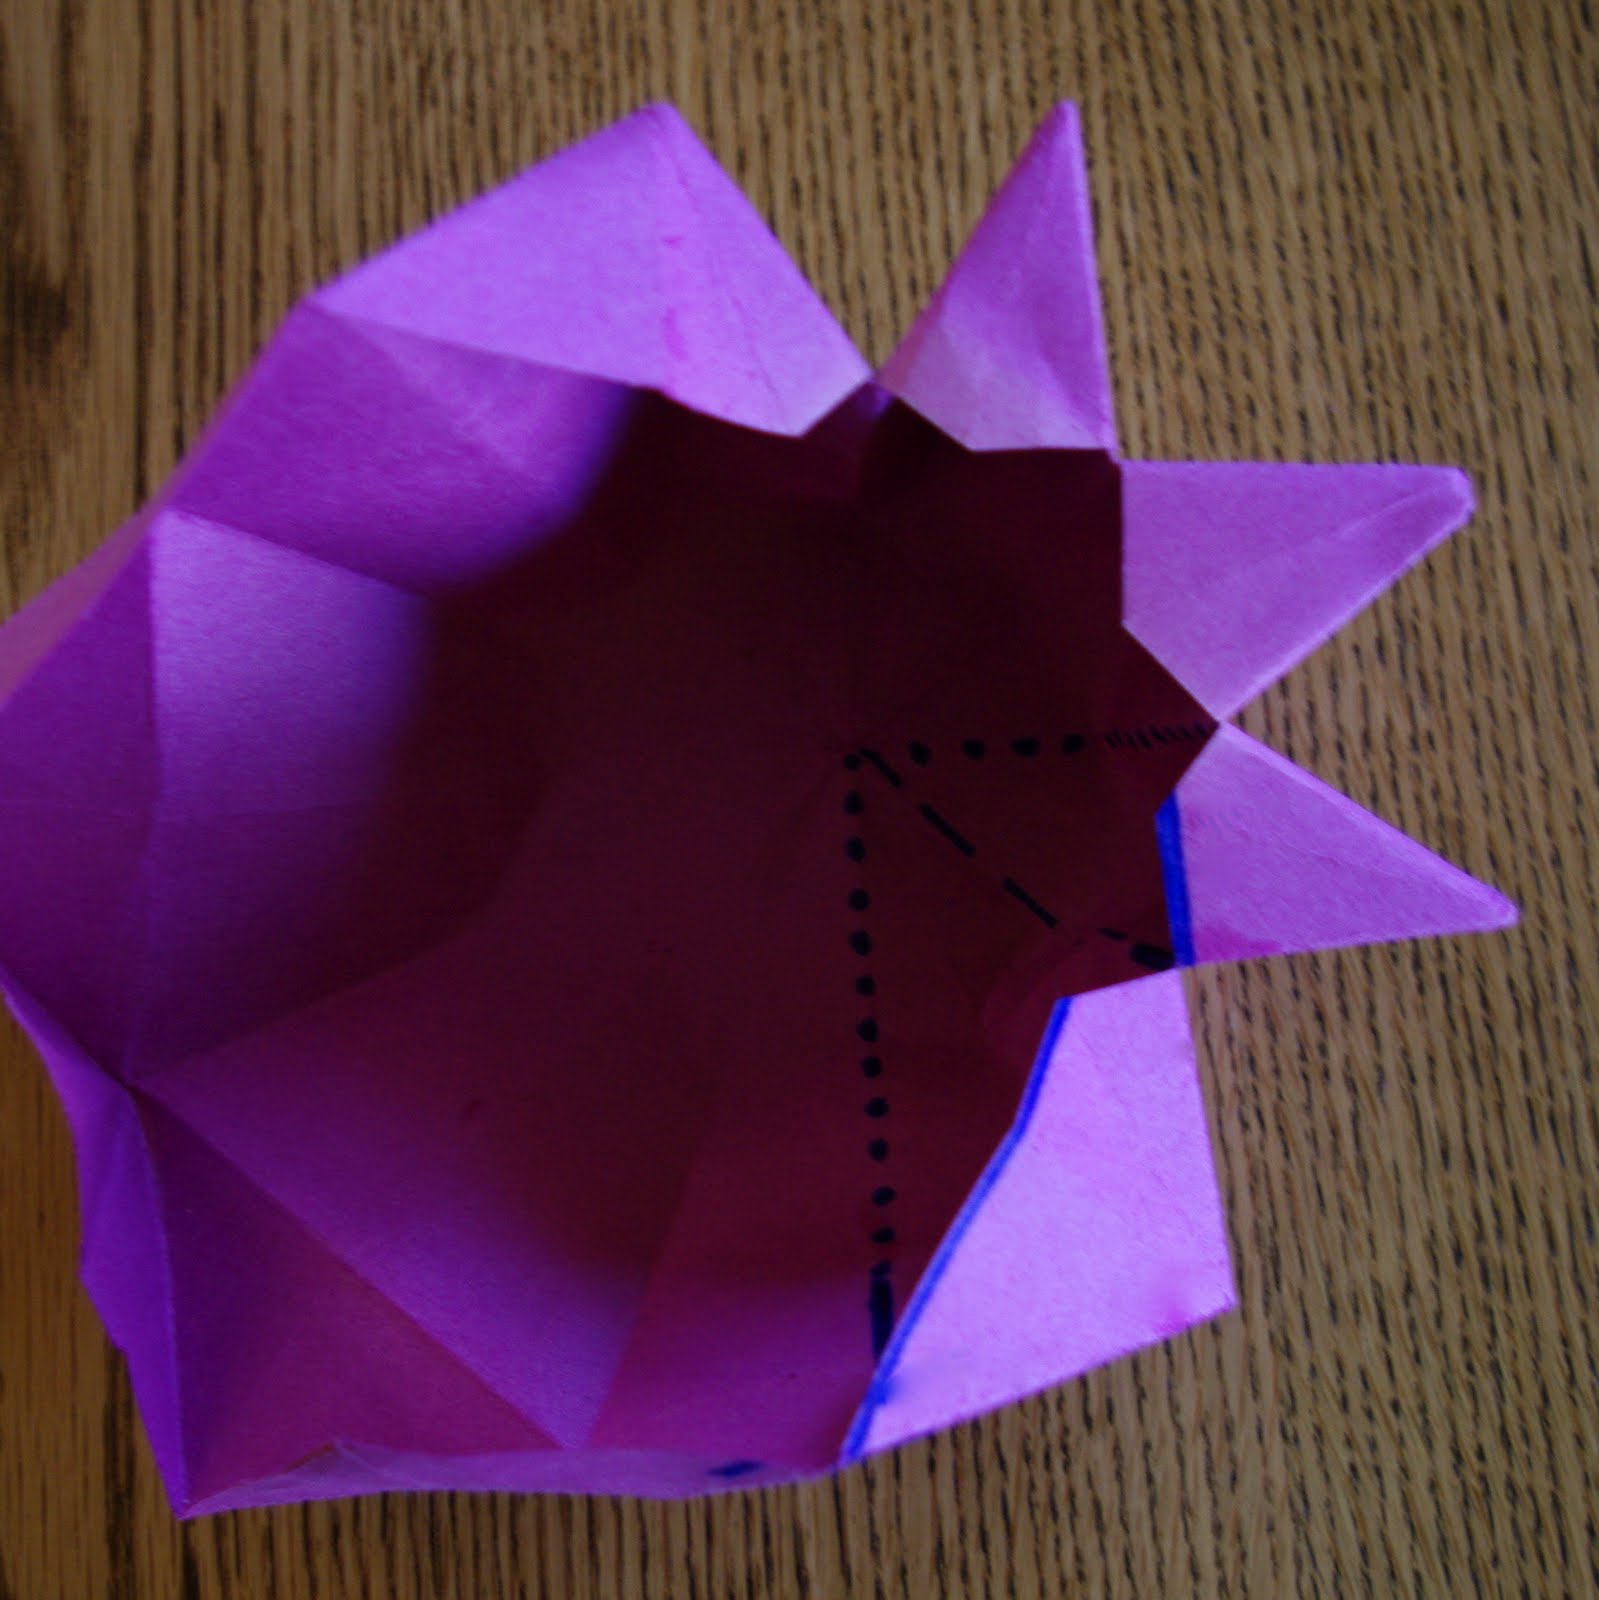
Continue doing this all the way around. By carefully cupping the paper and helping pop the folds into their proper place when necessary, the star pattern will begin to take shape.
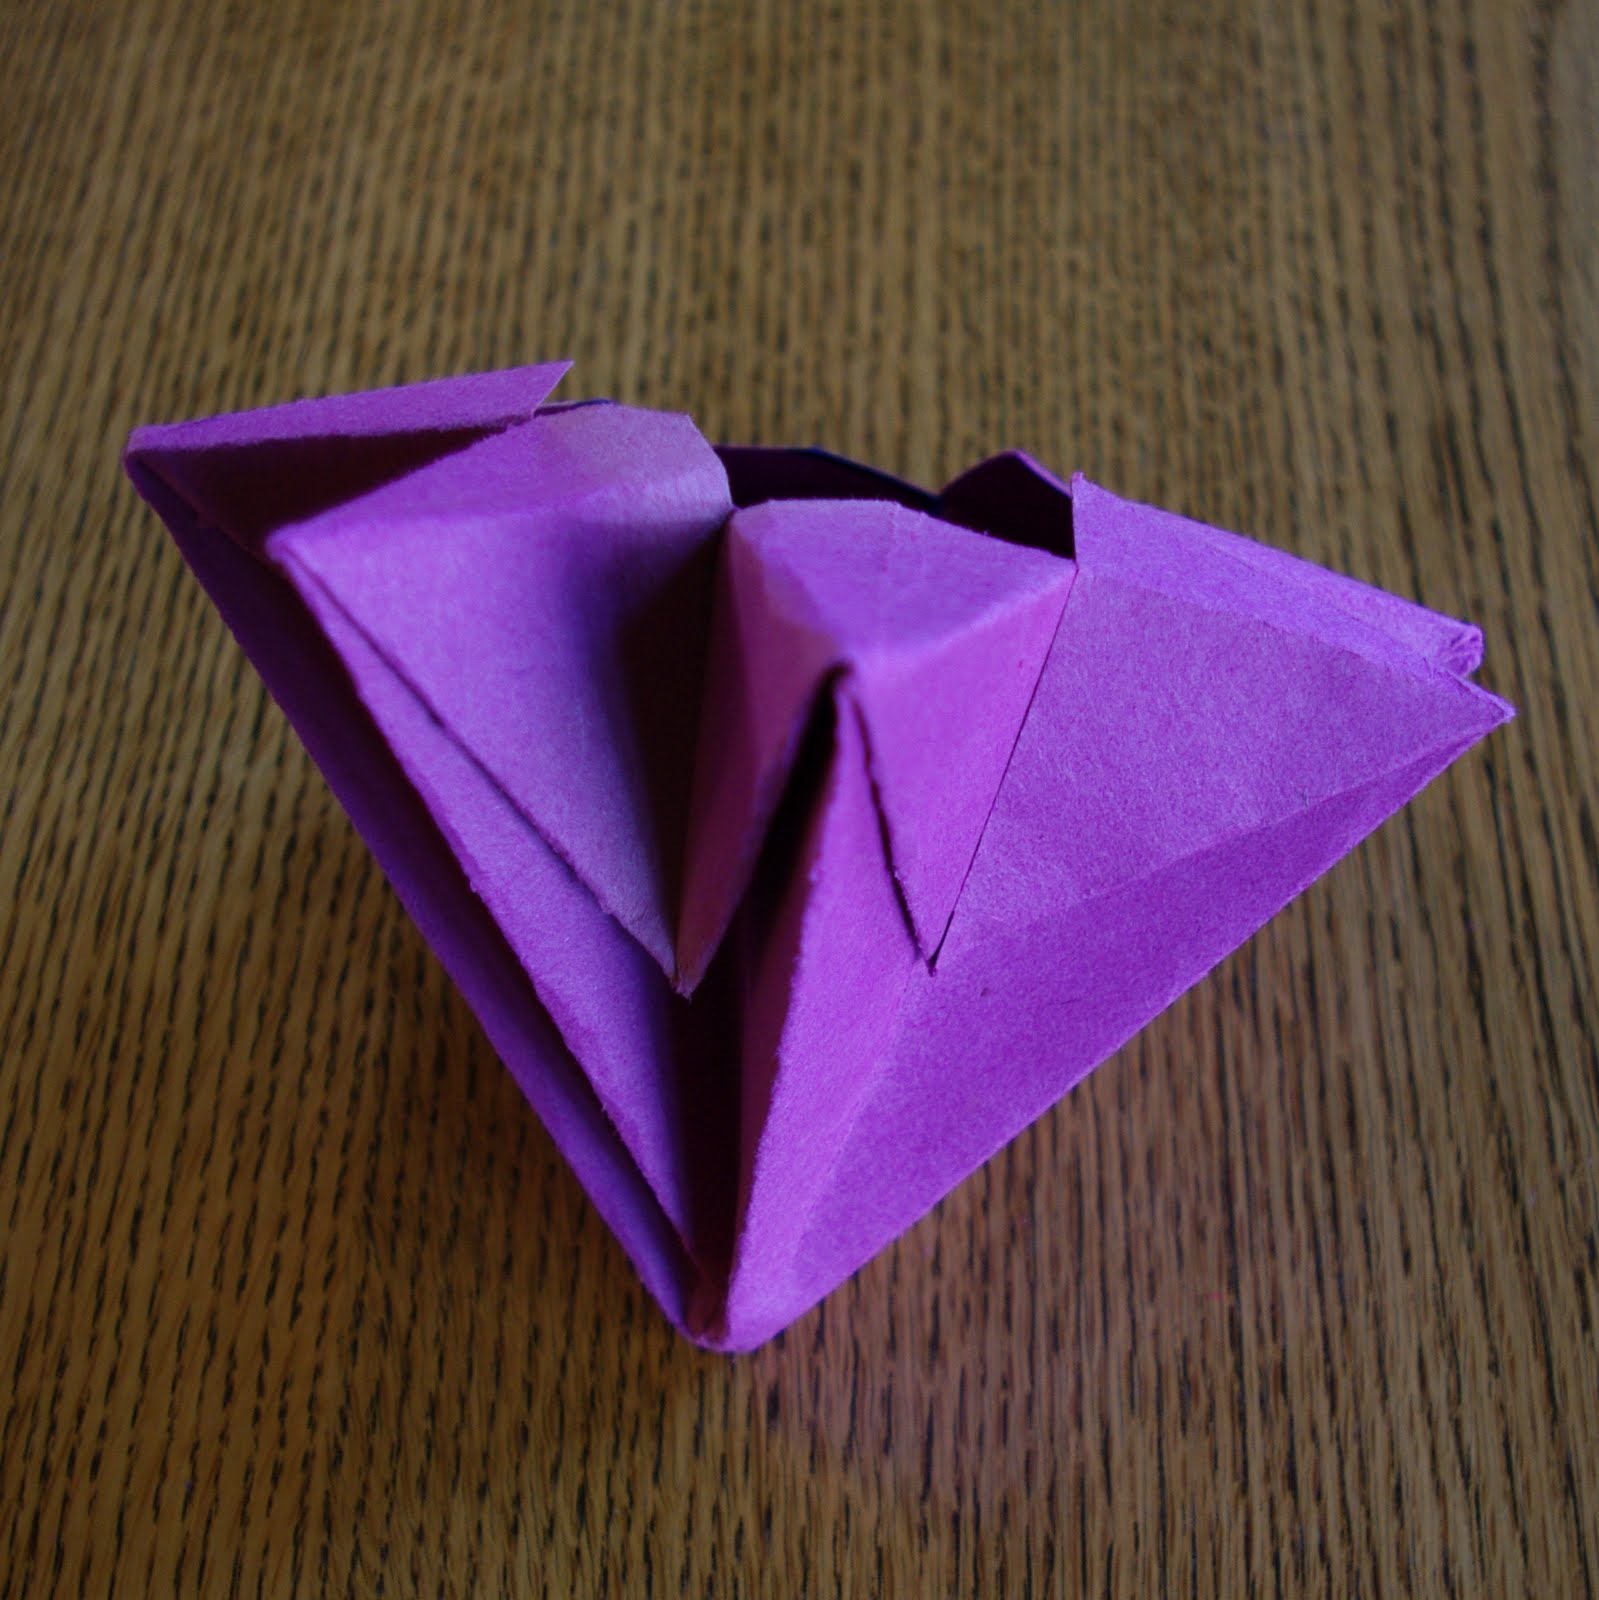
I have to say that when it all just fell into place I was quite surprised.

Press the project down onto a flat surface to flatten the bottom into a level cup shape.
The lantern I purchased was coated with oil which increases the translucency (and sort of magical quality) of the paper. To do this simply rub with any vegetable or olive oil prior to folding and let it dry overnight. (I would suggest perhaps attempting your first version without. )
Of course, these beautiful pieces are made of paper and so are quite flammable. I would suggest placing a glass votive around an open flame prior to putting it in the lantern and, as with all burning objects, caution should be used and candles should never be left unattended.
My mum likes to use those little battery powered tea lights and they are, of course, quite safe and a great option for very small children.